beautiful blossom on the trees on my daily local
'lockdown' walks! The overload of marshmallow pink
and white cherry blossom, the cutest lambs prancing
in the lush green fields, plus some stunning bluebell carpets!
And with that inspiration of nature's Springtime abundance
and growth, I was inspired to share this 'BLOSSOM' tutorial.
It's based on a wirework tiara technique and once you master
it (as I'm sure a lot of you already have!) it's also fun and
very therapeutic to use in many different jewellery designs.

You will need some 0.4mm wire and whatever selection
of small beads you have to hand. Let's start with a test
piece, a prototype, to get some practice. Following which,
you can then look at my other samples below to hopefully
inspire you to create your own unique pieces!
STEP 1

Cut an arm's length of 0.4mm wire. Place your round nosed pliers
at the centre of the length and twist both wires together to create
a small circular link.
STEP 2

Keeping the wires in a 'V' shape, continue twisting to form a
stem of about 1cm.
STEP 3

Thread one of the wires with 3 small beads and form a loop,
bringing the wire back around to the end of the twisted stem.
STEP 4
Grip the wires together on the stem and begin twisting the loop
of beads ...
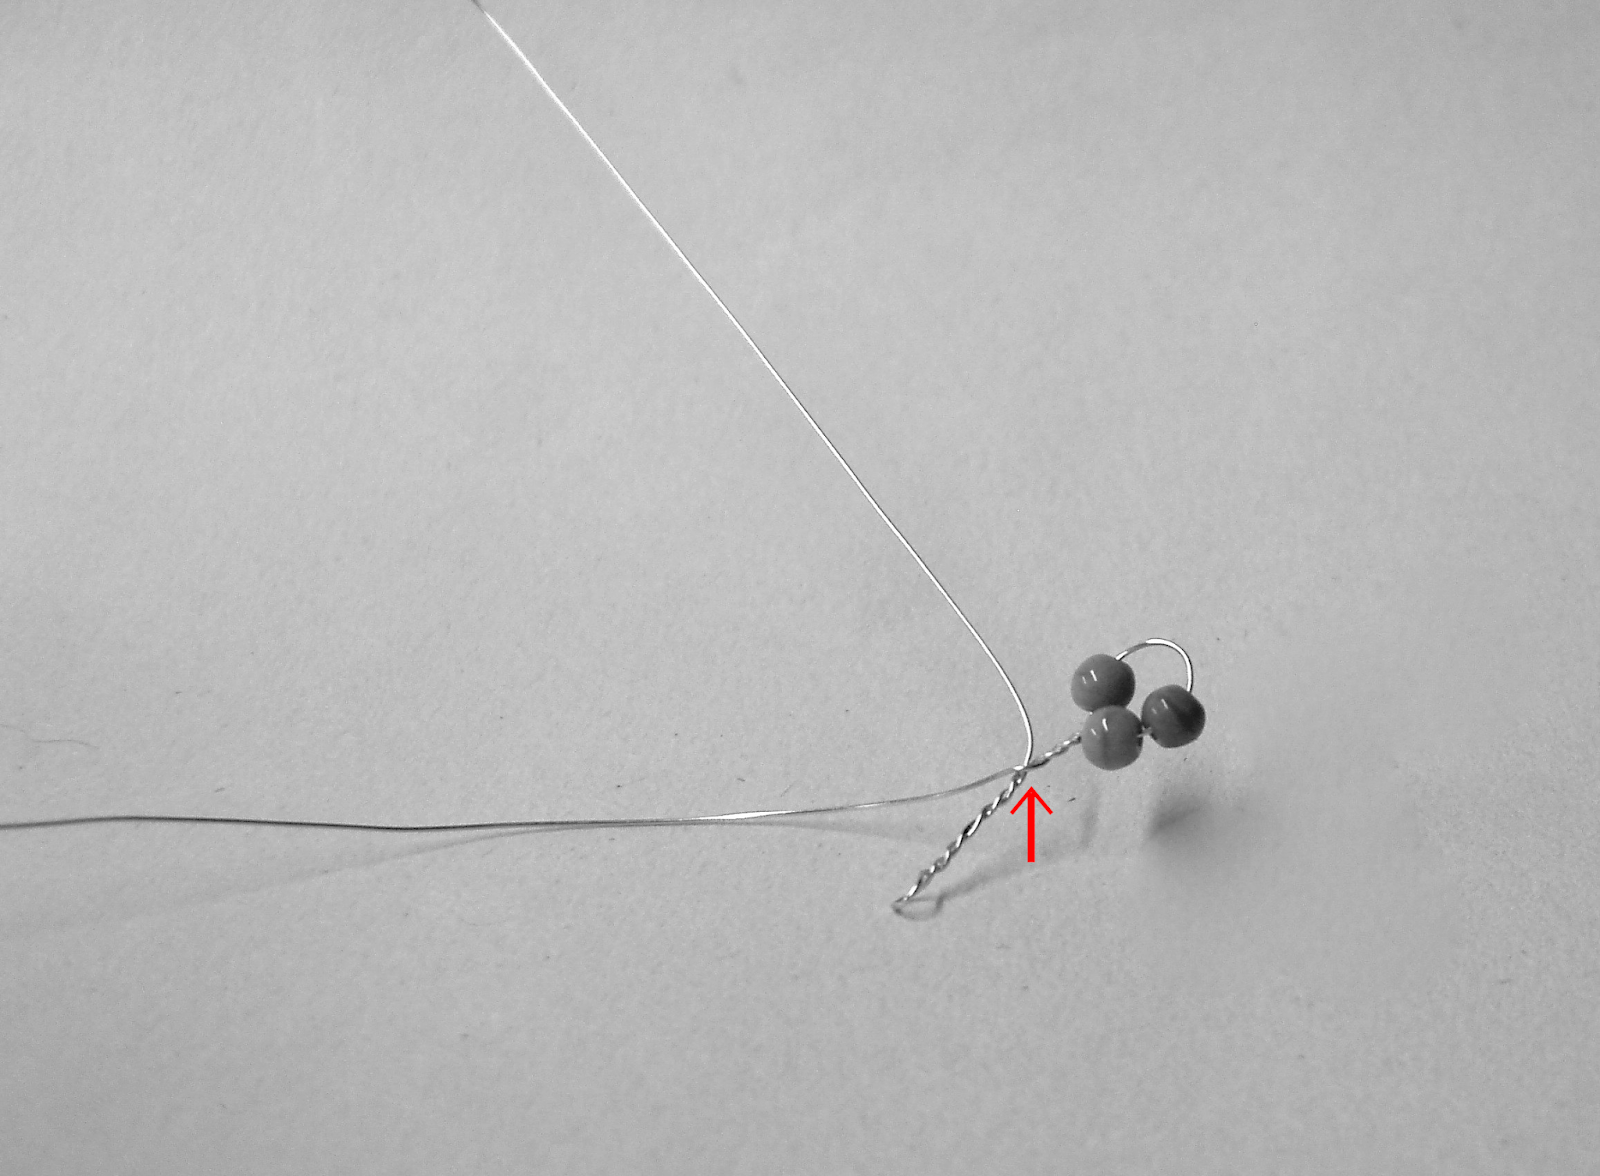
STEP 5

... continue twisting until the beads become tightly clustered
and the wire has rejoined the main twisted stem.
STEP 6

From that point, twist both wires together for another 1cm and
repeat the steps above to create another cluster of beads.
STEP 7
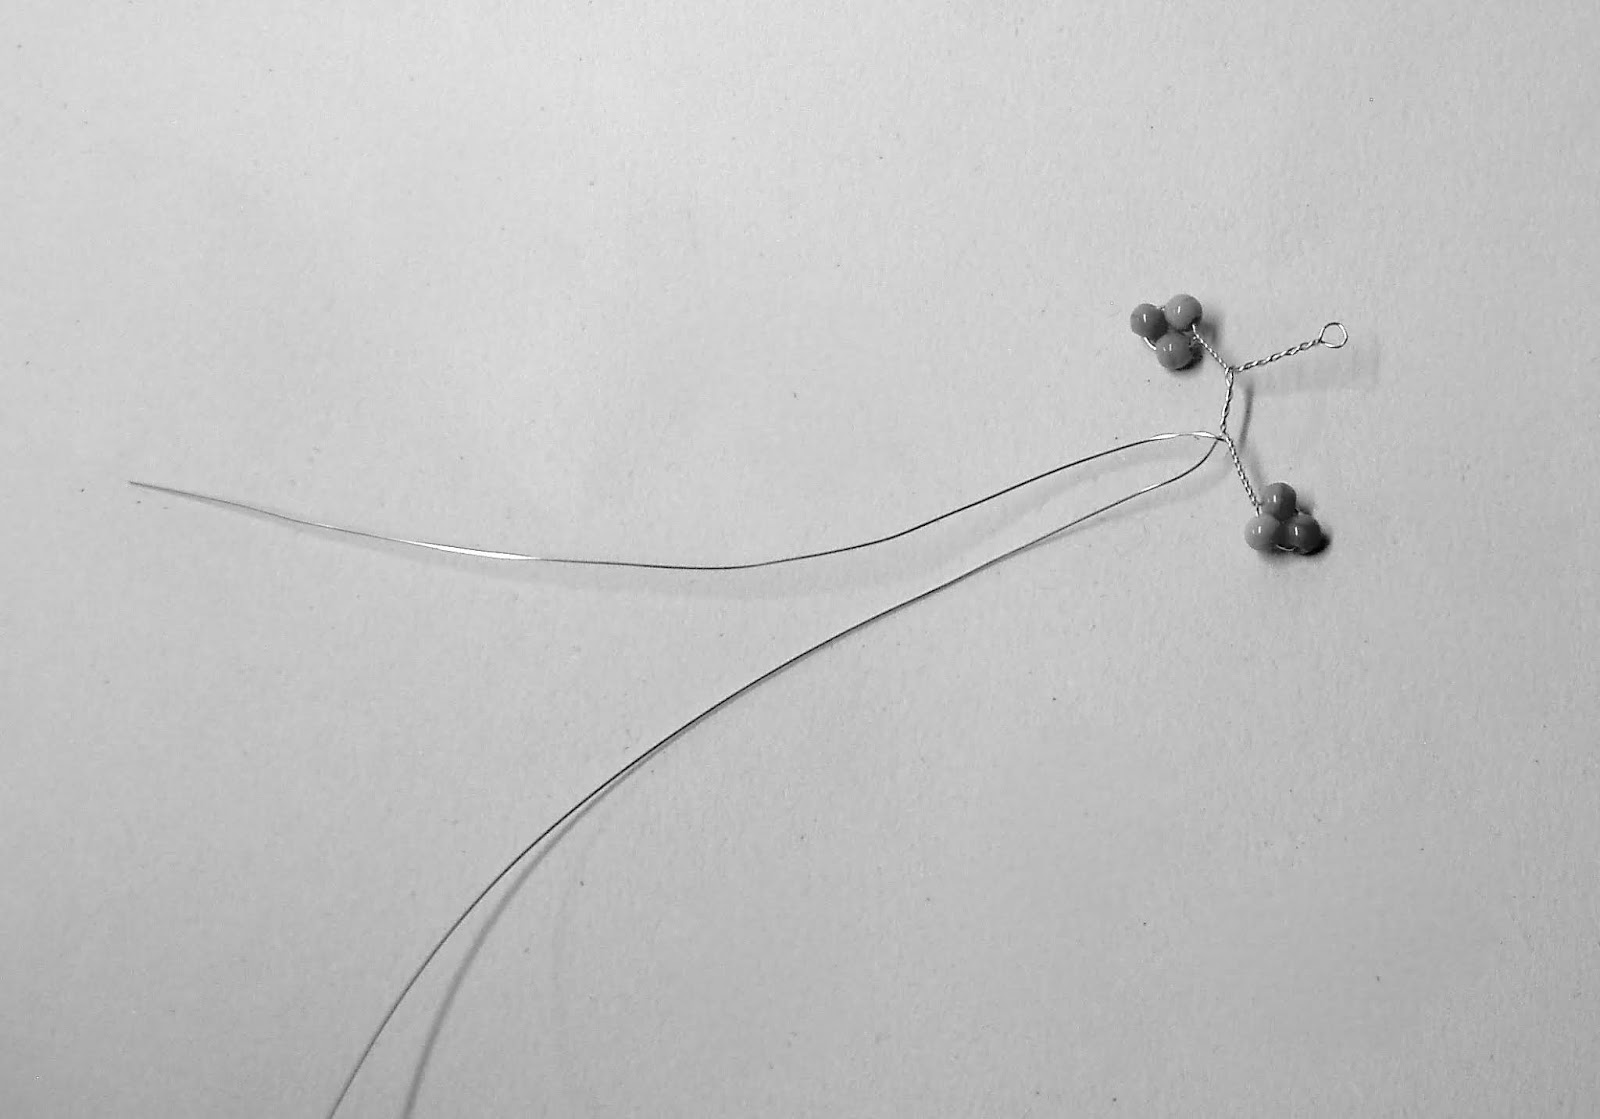
So, there you go! Repeat steps 3 to 5 to create your second
blossom branch!
STEP 8 (Beaded Leaf)

If you wish to create a LEAF on the branch, thread one of the
wires with some small seed beads, ...
STEP 9

Loop this beaded wire around, just as you did with the 3 beads.
STEP 10

And as before, twist together, gripping the wires at the main stem
and the beaded loop will cluster together from a twisted stem.
STEP 11

You can reshape the loopy leaf using your pliers and fingers, creating
a point at the tip and opening up the central area.
STEP 12

If you have enough wire, continue creating more beaded blossom
or, beaded leaves until you are left with about 1cm of projecting
twisted stem.
STEP 13

To add character to your branch, use the tips of your round nosed
pliers to twist and tweak the main stem and branches.
STEP 14

Create any shaped frame out of 0.8mm wire and hammer to work
harden. It can be a teardrop, a circle or rectangle, etc...
STEP 15

through the top stem of your frame.
STEP 16

Position the blossom branch at the centre of the frame and secure the
end wires of the twisted stem at the base, to secure in place.

Well done! You have now successfully completed your first blossom
branch prototype exercise!
Below are some further examples of this technique to inspire
you with your own designs!

Above is a Pearly Brooch, created in the same way, but a bit
more tweaking was involved!

Here are my Pink Blossom earrings in round wire frames.

This tie cord necklace, has beaded leaves and the peach
pearls are threaded onto the twisted branch to add a bit
more pop and colour!

And finally, above is a single twisted pearl necklace
plus some decorative hair grips, using a similar technique!
So you see, you can have endless
therapeutic fun, during your
creative quarantine hours,
twisting the night away!
Keep Safe. Keep Well. Keep Creative!
And if you don't like this tutorial, keep on eye on my regular
postings on my FACEBOOK page! Also, if you would like me
to do a specific theme or project for you, let me know and I
will post it in my next blog tutorial!


