... make lemonade!
I also think creating wirework pieces
can provide that same uplifting, positive
boost and I hope this simple little,
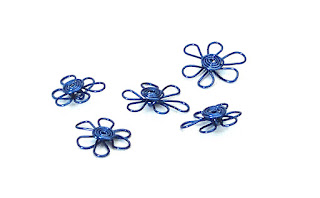
DAISY CHAIN DESIGN
brings a little warm sunshine
into your hearts!
You can link your daisies into bracelet chains, necklaces,
earrings, attach to pendants, onto cards ... in fact, they are great
as decorative embellishments on ANYTHING and everything,
created in any rainbow colour wire that you wish!
STEP 1
Working directly from a spool of 0.8mm (20-gauge)
wire, use your round nosed pliers to create the first
looped petal, leaving an excess of about 2cm projecting.
STEP 2
Place your round nosed pliers about 1cm or so from the
first petal and bring the wire around to form the second
loop ...
STEP 3
Continue looping the wire around, placing your round nosed
pliers opposite the last petal you've created ... it's just like
creating a line drawing doodle of a simple flower!
STEP 4
Depending on how large you've made the petals, stop
at 5 or 6 loops.
STEP 5
Cut the wire from the spool, leaving a projecting tail of
around 8cm. Use the short cut end to wrap around the centre
of the flower, securing it together. Cut off any excess and
neaten the end.
STEP 6
Create a spiral with the projecting wire, curling it in towards
the centre of the flower.
STEP 7
Flatten the spiral down into the centre of the
daisy and spend a little time adjusting the petals
and flattening the overall unit. Repeat the process to
create more daisies and don't worry if some are a bit
misshapen ... it all adds to the UNIQUE handmade
original, one-off, exclusively bespoke effect!
You can wire them on to cuff bangles!
Create them as dingle dangle, daisy earrings!
And here's a personal jewellery favourite, created with
rose gold wire and semi-precious rose quartz beads made
into a chain bracelet:
Attached to a pendant:
And it would be rude not to create earrings to match!
I HOPE YOU HAVE BEEN
INSPIRED TO CREATE
YOUR OWN DAISY CHAINS!


